Tuesday, April 26, 2011

One sleeve down...


Another update and I've made some progress. Including button holes. But now I'm feeling sort of MEH abound the whole project. More here.

Sunday, April 17, 2011

B4919 modeled

So here is the dress on me:

This reinforces the idea that a defined waist style is not the most flattering on my figure. Also, that I need to be more careful about not creating boob flowers (though they are much more prominent in the photo than IRL, for some reason). But making this was an interesting project.

I had 5 yards of this 50-inch wide cotton lawn, which wasn't enough to make this dress. As I mentioned in an earlier post, I did not use the skirt pieces in this pattern because I didn't have enough fabric for the circle skirt; instead I used a different 6-gore skirt pattern.  For the same reason, I cut the bodice facing (really a full lining) out of black broadcloth, and I pieced the ties, which take a lot of fabric because they are cut on the bias. Joining the skirt to the bodice was a little fiddly, and I ended up hand stitching the edges in place to cover raw edges. However, the attached ties cover the waist up completely anyway.

The pattern provides no alteration lines on the bodice, but I  made many: an FBA, added side darts, added several inches in length. I made no adjustments to the back except that I didn't sew the waist darts. I added about 6 inches to the waist. I also sewed the center front seam a bit higher, and I curved it in so that it wouldn't gape open.

I don't know if I'll ever wear this dress, but it might be appealing on a hot summer day. The fabric feels very nice.

 Envelope art:

Sunday, April 3, 2011

It's a Mad, Mad, Madmen World

Hi Darlings!
Good news on the home front - my vintage jacket is done! I love it and will definitely make it again! I love the quirky design and it was easy peasy to construct! This go around the "pop" is on the inside of the garment - take a peek at the lining! For the jacket I used yardage from my stash that I have been itching to use for years so I'm happy to have it put to good use but I think the quirkiness of the design deserves a little more life! Whereas I like the fabric (I wore it with an ivory pencil skirt to work) I know that I will definitely be less conservative with my next iteration of this garment! And - - I've included a photo of the infamous drunken, kidney donor bound buttonhole (see Facebook post below) - not my best work but you'll understand why, in my view, it's just perfect!!
I love love love the sleeves on this jacket! Perhaps it's best design feature!


Pop!

Vintage button - I love that the geometry of the button matches the weave of the fabric!

The drunken, kidney donor Facebook post:
"Just in case anyone was wondering - bound buttonholes and drinking do not mix!! Here's the backstory.... my good friend, Jack, recently donated one of his kidneys to a neighbor (I know - how insignificant do YOU feel right now??) - anyway he had a HORRIBLE post-op course but he turned the corner this weekend. So yesterday my friend Ava and I were having a sewing marathon and we decided to take a bottle of wine to the hospital to toast Jack's road to recovery with his wife, Julie! Well we did that and I apparently am now a light-weight because when we came back and resumed our sewing the resulting bound buttonhole was not pretty (not awful but not pretty)! I thought about taking it out and trying again - but ya know, I am leaving it there with all of its imperfections so that I will remember the night we toasted my friend Jack, the hero!"


Thanks to Joanne and Meg for organizing and hosting the sew-along! What's next up on the sew-along queue??


Heads, Tails, or Sleeve Cuffs?


Hey Ya'll! So I've been tweaking my muslin. Since I'm trying to mimic the piping in this Ralph Lauren Dress, I'm trying to make heads or tails of these cuff instructions. Any tips, cause I'm really lost. I'm doing sort of a "cuff interfacing" which is really just sandwiching two together with piping... and does this make any sense? Still, the instructions look like the cuff is the wrong side out in the 'how to' but the main illustration seems right.
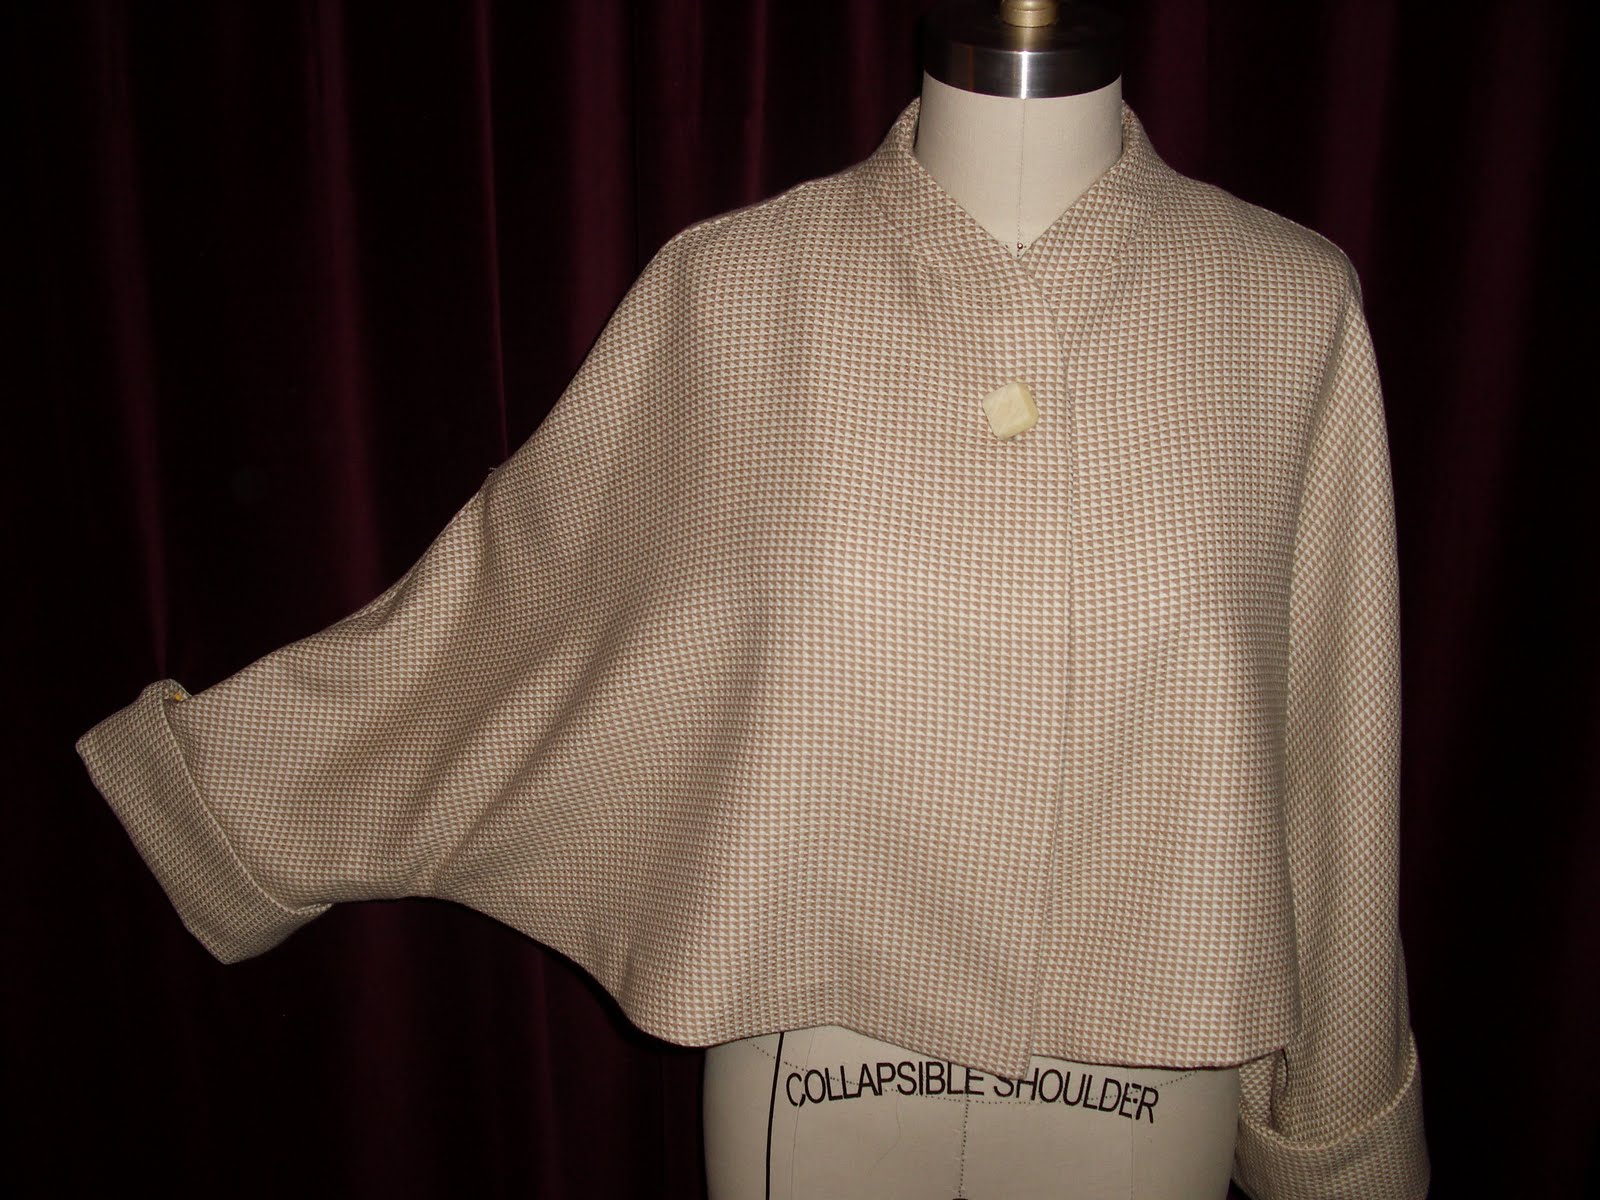
Sunday, March 20, 2011

B4919 almost done

Here it is on the dress form (sorry the picture is so blurry):


I still need to sew on the hooks and eyes and hem it.

Coming back to life...

Sorry Vintage vixens, but lost many weeks due to caring for incapacitated husband waiting for back operation. I think we're easing off of emergency mode and while he recuperates slowly, I'm hoping to get back to my Vintage Vogue Adele Simpson soon.
Love your work, darlings!
Chanel No. 6

Progress, at last!

Today I figured out why I had stalled - fear of cutting the fashion fabric. Which, of course, is silly.

Having talked myself out of this state of mind, I have cut the fashion fabric and started construction. I decided to line the dress with the lime green muslin I had made, for 2 reasons: the fashion fabric is a light cotton and needed some stability and opaqueness; and I forgot to draft new facings when I altered the pattern.

I am up to inserting the zip - a job best left for another day I've decided. Then I can finish the armholes and hems. If I can keep up today's momentum into the next few evenings, I might be able to wear my new dress to work before the week is out. I just hope this lovely, sunny, warm weather we've had over the weekend holds until the dress is done!

Tuesday, March 15, 2011

A work in progress

Here's what I've got thus far

I'm unthrilled with the construction of this, really. It's just not up to snuff. But to save it from being a total wadder, I had to just wing it. The sleeves disappeared and it became a tank top. Which doesn't suck too badly, I guess.

The skirt is still in pieces. I drafted a yoke for the top of the skirt but somehow, I've gotten a wee bit larger in the nidsection than my dressform. Ahem. I'm blaming it on Valentine's Day. That's my story and I'm sticking to it.

The crinoline/fluffer was pretty OK if time consuming to make. I ended up watching "Marigold" with Ali Larter to pass the time whilst I gathered and pinned and gathered and pinned. 111 minutes worth. Give or take a couple of fastforwarded song/dance scenes. As Bollywood musicals go, this one was a B- for song/dance and an A- for story/plot. There weren't any real surprises, but then, Bollywood movies tend to follow a very formulaic standard.

The crinoline isn't hemmed yet, but it will be soon. I've got to address the yoke fitting first and then attach the skirt and THEN hem the crinoline. I estimate that this project will get finished around Friday. I'd hoped for it to be my Easter frock, but it's not looking hopeful. We'll see...

The BEST part of this was the buttons and buttonholes. I did those while watching Herculues and the Lost Kingdom on Netflix. Each button is precisely placed and the buttonholes were perfect fits. YAY!

MIA - Still working...

This pattern has been extremely challenging. I'm still working on the bodice/blouse. It's been a total pain in my tush. Construction is going sloooooowly and the level of detail that I normally use is falling by the wayside in an attempt to just FINISH this thing.

Saturday, March 12, 2011

How about those mitered corners?

Soooo... how about some evidence of participation? Here is a photo of my first muslin for the 1930s jacket:


Apologies for completely forgetting to get a photo of the back of the jacket! This was finished in February, but I never got around to taking pictures until recently. And even though it's taken me so long to get to, I don't even have a second muslin to show! What a terrible sew-alonger, right? Anyhow, the pattern is for a 36" bust, which isn't too far off from my own measurements, but the jacket is still pretty baggy and shapeless, so I'll be taking it in, and possibly re-drafting the arm-hole area as it's super baggy there. I'm absolutely determined to get this done even if it means doing it in little bits over a period of months in order to save my sanity (I hate mitered corners and didn't realize this jacket features four of them until sewing the mock-up...). But thanks to all you sew-alongers for being a source of motivation, and I'll be posting a second muslin here in the coming weeks if it's still open for posting :)

Monday, March 7, 2011

I have not dropped out

I'm hoping to finish my dress this week. I have sewn together the bodice, bodice facing, and skirt. What's left to do: sew bodice and facing together and turn; sew skirt to bodice; sew in zipper and hooks/eyes; hem.

I got stuck last week when I started thinking I should finish the seams, something I have never done (learned to sew at my mother's knee, and she never bothered with seam finishing). I'm still on the fence about it; I'll see how I feel when I next sit down at the machine.

Saturday, March 5, 2011

Givenchy Finished !


Finally.
Multiple diversions (read other sewing projects) before completion.
Things I did/learned along the way.

* Vintage patterns are for very skinny waists. Always make a muslin. I did muslin the bodice. Thank goodness. This pattern would have been up under my bust. I lengthened the bodice.

* I used a cotton/poly and lined/underlined with silk organza for some body. It was the right amount of poofy. The bodice I underlined with charmeuse. The pattern called for facings. Facings are a nightmare! I would line before face. Just a personal taste.


*The pattern required a satin ribbon for the waist. I thought this would be too prissy (me who loves ruffles) and thought the same fabric sash would be be understated. I cut it on the bias.

* I love the wide neck. Some clavicle is good. I think in a silk dupioni or satin duchesse in a solid color, this dress would be really pretty.

* I enjoyed the Sewalong. It was perfect for January and just the right amount of kick needed to get the job done!

                                                            Happy Sewing All!

Tuesday, March 1, 2011

Du Barry 5766 - Done! Ta Daa!


I almost had this completed by the deadline (last night), but was just too tired to try to finish.  I hemmed and sewed buttons this morning.  I'll post a pic of me wearing it later this week.

This was a fun project.  I REALLY like the dress, and I think I will really enjoy wearing it this spring and summer.  It fits well (IMO) and feels comfortable.  The fabric is just the right drape.  I have more vintage patterns from this era.  I need to dig them out and start working on them.

I still have a more detailed post on my blog

Sunday, February 27, 2011

Finished: Vintage 1959 Jacket


It's done!

Definitely one of the more challenging things I've sewn, but I'm glad I made it and I think I'll get a lot of wear out of it. All the details are here on my blog. Thank you, Joanne, for coming up with the idea for this sewalong--it was fun!

Saturday, February 26, 2011

Stalled

Everyone's projects are looking great. I fear I have lost a bit of momentum on my piece. I plan to do some more work on it this afternoon, but I know it won't be finished this month - soon, but not this weekend. Hopefully by early to mid March I'll be posting my finished frock.

As Tim Gunn would say, Carry On!

Finished! Patt-O-Rama Dress

Patt-O-Rama 8302 was printed in 1950-something, and is a princess seamed sundress with pockets.  I've always had a love affair with this decade, and this is a sundress that is appropriately cut for work wear, too.  I won this pattern in a free giveaway from Lisa at The Hem Line.  She has specializes in vintage patterns, and has an ebay store and an Etsy store.
It's an unmarked pattern, with small holes and notches for the important "landmark" points.  I was very, very intimidated to work with an unmarked pattern, but it was really very easy.  I used a batiste print from the stash, as this version was supposed to be a wearable muslin.  I lined it with a white cotton batiste, and it's the perfect weight for warmer weather (as I look outside to see more snow falling with 7" already on the ground).  The fit was very nearly spot on, just needs some small adjustments in the bust area, but nothing preventing me from actually wearing this "rough draft"!
Back View
The pattern was missing the neck and armhold facing pieces, but that wasn't a problem, since I had to line the whole dress anyway.  I skipped the buttons on the center front and the pockets, since I thought they would get lost in the print (and I didn't have 5 matching buttons in the right color anyway).
I have the fabric and supplies to make the final version, using white (with small red polka dots) cotton and more batiste lining. February was going by so quickly, and I knew that I had to get this one finished and posted before the month ended!

Monday, February 21, 2011

Walk Away Dress Finished!

 I finished sewing my Walk Away Dress this weekend!  I made all the adjustments and the fit is great!  I was so happy to be a part of this sew along as it was a first for me.  I want to thank Joanne M & Lindsay T for all their hard work of putting this together!  If you want to see more details & pics its blogged here


Thanks for all the helpful comments & I cant wait to see all the finished projects!


Progress (Butterick 4919)

I finally decided to cut out my fashion fabric -- and realized I didn't have enough! Five yards @ 50" wide just doesn't work with this pattern's full circle skirt.

I thought about using some other fabric, but I really wanted to use my cotton lawn print for a number of reasons. So I'm going to combine the bodice of 4919 with Butterick 4136 (which I've made before, so I know it fits):


I'll put use View A (a length somewhere between A and B) and cut the back piece in two pieces with a seam allowance so it will match up with the back seam of the bodice. I do have enough fabric for this, and I think it will give the same effect, especially in this soft fabric.

I will need to use some other fabric for the facings (they are really full linings of front and back bodice) -- maybe just some black broadcloth that I have on hand. It may actually look better than using the print as facings because there will be no show-through.

So I just cut out the bodice front and back using my altered pattern. I also decided to piece the ties rather than cut them in one piece with the back, as in the pattern, because it would have really used up a lot of fabric if I hadn't, and I don't think it will be obvious in the finished dress.

I suspect that home sewers in 1952 who made this dress may have economized on fabric in the same way (especially considering that wide fabric widths were not easily available then), so I don't feel too bad about it.

Sunday, February 20, 2011

McCalls 4115

Ok, after some fits and starts, I finally decided on this pattern for my sewalong pattern:


It actually has similar bodice lines as my other sundress pattern, and the best part is I now have TWO vintage dress patterns fitted!  (I did fit my other pattern, I just got more interested in this one before I made the real thing!)  

Here is the finished dress:


And, if you'd like to read more about the process, it's all there on my blog!

Wednesday, February 16, 2011

Update on Velvet 1940s Dress

I wish that at this moment I was uploading pictures of my completed fabulous red velvet dress.  I started it with the intention of wearing it on Valentine's Day and well, Valentine's Day has come and gone, and still my dress is not completed.

Women who turn out dresses every week (ahem-- I know some of you do!) and even those who turn out dresses once a month are an inspiration to me.  You guys blow my mind.  I've spent hours working on this dress and yet, it's not finished.  On Sunday night I made a mad push to get the dressed finished, but after I passed two hours ruching and stitching up one sleeve-- and I haven't even set it in yet!-- I hung my head and realized that it simply would not get done that night.

So now I need the encouragement to press on with a red velvet dress now that spring is on its way-- a dress that I no longer have anywhere to wear it to:(

Tomorrow morning I embark on a cruise with my family to the Bahamas.  Chances are that this dress will not be complete before the end of February (I return on the Feb 26th), but hopefully I'll be able to post a picture of the completed dress sometime in early March.  Hopefully.

I'm excited to see what y'all have been doing-- keep 'em coming!

*I should add that the dress looks lovely so far.  I still need to attach the sleeves, make shoulder pads, install a side placket with snaps, hem, and make a fabric-covered belt.  That should be doable, right?

Monday, February 14, 2011

Pink 60's Dress

This is the pattern I used to make my pink dress. The pattern has a round neck but on me it was way too tight, it felt constricting and way to much fabric across the chest so I converted it to a V-neck a much better look for those of us with fuller busts. Esmerelda, my dress form, doesn't quite fill out the dress the way I do hence the wrinkles on the front and the dress isn't hemmed yet which is why you can see tiny strands of thread hanging off the bottom of the dress.
The dress was underlined with a fine pink voile meaning I could stitch the dress pieces as one rather than worrying about a lining. The fabric has a lot of body to it, I actually think there may be some wool content.
I top-stitched all the seams and the V-neck including either side of the invisible zip on the back and used facings for the armholes and neck edge.
Overall I enjoyed the experience of sewing a vintage dress and will definitely be sewing some more.
I'm enjoying  seeing what other people are sewing from vintage patterns too and being able to post all our progress to one blog is an excellent idea.

Project Walk Away Dress - Take 1


I finished the muslin for my Walk Away Dress!  I have worked out the problems with this pattern & have transferred the adjustments onto my fabric for my "real" walk away dress which I hope to have done by the end of this week!  If you want to read more I blogged it here

I like this pattern & I wore this dress all day!


Sunday, February 13, 2011

Is it procrastination or am I just having too much fun??


Probably a bit of both! I realized that I hadn't posted a photo of my fabric and pattern. So here you have it - my jacket and lining fabric and vintage-inspired pattern! And - I agree that the lining fabric may not be "period authentic" but I love it and it was in my stash and I love me a fiiiine lining POP!!

Making progress! I WILL finish it before the Ides of March!!!!!

xxoo
Laura

Friday, February 11, 2011

Slow and steady

I have made some, but not much, progress on my 1970’s dress. Since my last post I have made a few tweaks to the muslin and I am now very happy with it. I am also satisfied that the riding up in the back was from me putting my hands on my hips and not smoothing the skirt down again, rather than a fit issue per se. The lime green lawn I’m using for the muslin is so light I think it clung to my underwear.
Over the next week or so I intend to transfer the markings from the muslin to the (traced) pattern, and then I will use the lime green lawn to underline my dress. Which brings me to my fashion fabric choice: I have decided to go with a cotton print featuring large green and blue flowers. Truth be told, I chose this fabric in part because I already had a long green dress zip in my stash, and also I want to be bolder and more daring in my sewing choices, and this will certainly be bold. I asked Ant Queen for her opinion, and she agreed that it will work in the sleeveless style, but if I had added sleeves it would be a bit over bearing. I am so pleased with this choice, I am already imagining other pieces to make that will go with it, as well as garments already in my wardrobe.

Wednesday, February 9, 2011

Finished - Sixties Shift Dress


I've finished my project too!  Here's the original pattern as a reminder:


I used embroidery floss for the decorative stitching:


which added another couple of hours to the project!


There's a bit more on my blog pattern~scissors~cloth

Thanks JoanneM and Lindsay T for hosting the sewalong!

Tuesday, February 8, 2011

COMPLETED: 2011 VINTAGE SEW-ALONG...

...it feels like I worked on this simple skirt FOREVER, but that was because I took about two weeks off from it to get my sewing room put back together.  But now it's finally finished!
  • I worked out removing the extra width from the back of the skirt pretty well.  By doing so, I changed the original design from A-line to a somewhat straight style.
  •  I graded the original pattern up two sizes.
  • Practiced my invisible zipper application (still needs some work).
  • and I completed  another sew along.
  • Now that the skirt is finished, I have another wool blend plaid skirt to add to my winter wardrobe.
 
I gave it a spin around the block yesterday, and it wore quite well.  Thanks for allowing me to tag along on this - it was fun, and I did learn a few things in the process.

Sunday, February 6, 2011

Muslin for Walk-A-Way Dress


I am feeling great that I have got this far in this sew along!  I have had pattern problems before but so far this dress is easy for a novice like me!  I think I just jinxed myself!!  Anyways, after I got over my fear of how much fabric there was I got to cutting & I have sewn  my muslin to this point.  I had some length issues so I took off about 2" so it is not totally even.  The neckline was not looking great on me either so I cut it out in a sweetheart neckline using my own heart template as I do not have a pattern for a sweetheart neckline.  I also need to move the bust darts down a little for a better fit.


Looking at these picture the length is still too long and the dress seems to be off in the front.
The back seems O.K.   The arm hole edges seem to be gaping a little but maybe when I sew on the bias tape it will fit better?  Now to work on the front buttons and hems, & finishing!  Any suggestions?